Scheduling a mold assessment is one of the smartest decisions you can make to protect your home, health, and investment. Whether you’ve noticed musty odors, visible spots, or recently experienced water damage, a professional mold inspection ensures you’ll get clear answers.
But what many homeowners don’t realize is that preparing your home before the inspection can make the process smoother and more accurate. In this step-by-step guide, NTX Enviro explains how to prepare for a mold assessment in Texas so you’ll know exactly what to expect and how to get the most out of the inspection.
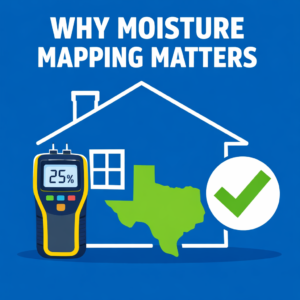
Why Preparation Matters
Mold inspections involve more than just a quick look around. Licensed consultants use specialized tools, moisture mapping, and lab testing to identify hidden issues. Preparing ahead of time helps:
- Ensure the inspector has full access to areas of concern.
- Prevent accidental contamination of samples.
- Save time and reduce the need for rescheduling.
- Improve the accuracy of test results.
Step 1: Avoid Cleaning or Disturbing Suspected Mold
It may be tempting to scrub away visible spots before your assessment – but resist the urge.
- Cleaning may spread spores and cross-contaminate other areas.
- Using bleach or antimicrobial sprays can alter sampling results.
- The inspector needs to see the problem in its current condition.
👉 Keep affected areas untouched until the consultant has completed their inspection and testing.
Step 2: Control Indoor Conditions
Indoor conditions during the assessment can influence results.
- Turn Off Air Purifiers: These may reduce airborne spore counts and skew results.
- Minimize HVAC Use: If safe, avoid running HVAC for a few hours before the test. This prevents spores from being artificially diluted.
- Close Windows and Doors: Keep the indoor environment stable for accurate sampling.
Step 3: Provide Access to Key Areas
Step 3: Provide Access to Key Areas
A mold inspection often involves checking areas you may not think of. Be sure these locations are accessible:
- Attic and crawl spaces
- Basement or utility rooms
- Around plumbing fixtures (under sinks, behind washing machines)
- HVAC closets and duct access
- Closets, corners, and rooms with reported odors
Clear away boxes, furniture, or stored items that might block these areas so the inspector has unobstructed access.
Step 4: Gather Background Information
Your inspector will ask questions to better understand the history of the property and the issue. Prepare this information:
- Recent Water Damage: Leaks, floods, or roof issues.
- Previous Remediation: Any prior cleanup or contractor work.
- Health Symptoms: Allergy flare-ups, asthma issues, or unexplained fatigue.
- Odors: Locations and times when musty smells are strongest.
The more detail you can provide, the better the inspector can focus testing in the right areas.
Step 5: Limit Household Activity During Testing
On the day of your inspection:
- Keep pets in a separate room to avoid disturbing dust or samples.
- Minimize foot traffic in areas being tested.
- Avoid vacuuming, dusting, or cleaning right before the appointment.
This ensures air samples reflect normal conditions instead of short-term disturbances.
Step 6: Understand the Process
Knowing what to expect can reduce stress. During a professional mold assessment, NTX Enviro will typically perform:
- Visual Inspection – Looking for visible signs of mold, staining, or water damage.
- Moisture Mapping – Using thermal imaging and moisture meters to locate hidden dampness.
- Air Sampling – Collecting indoor and outdoor samples for lab comparison.
- Surface Sampling – Swabbing or taping visible mold spots for analysis.
- Detailed Report – Providing lab results, photos, and recommendations.
Step 7: Prepare for Next Steps
Your mold assessment is just the beginning. Depending on results, you may need:
- A remediation protocol written by the consultant (if mold is found above the threshold).
- Licensed contractors to perform cleanup (required if 25 contiguous square feet or more is impacted).
- A Certificate of Mold Damage Remediation (CMDR) to protect your property value after remediation.
Common Mistakes Homeowners Make Before an Assessment
- Cleaning visible mold before inspection (alters results).
- Blocking access to attics or crawlspaces (slows inspection).
- Not providing property history (leads to incomplete reporting).
- Waiting too long after water damage (increases mold growth and costs).
Avoiding these mistakes ensures your inspection is accurate, efficient, and legally compliant.
Preparing for a mold assessment is simple but important. By avoiding premature cleanup, controlling indoor conditions, ensuring access to key areas, and gathering background information, you help the consultant deliver accurate results and protect your property.
Remember: a professional mold inspection isn’t just about identifying problems – it’s about providing peace of mind, protecting your family’s health, and ensuring compliance with Texas law.
👉 Schedule a Professional Mold Assessment with NTX Enviro Today
Dennis Butts is a Texas-licensed Mold Assessment Consultant (MAC) and principal of NTX Enviro Consulting Services. He provides mold inspections, remediation protocols, and post-remediation verification services throughout North Texas.